Log in or create new account to save this product to your wishlist.
Lavender Cuttings: a step-by-step guide
Lavender adds a delightful scent and a beautiful splash of colour. And you can grow this glorious plant from cuttings! It’s literally the plant that just keeps giving!
🌱 All important maintenance moments for your lawn during the year. Leave your email and we will send you the lawn calendar for free.
Enter your email
Receive the lawn calendar in the mail
Enjoy a green lawn all year round!
- Order by 2PM = shipped today
- 250.000+ satisfied customers!
- 60 day satisfaction guarantee
There are few plants whose scent can excite the senses like lavender. And luckily, lavender’s a plant that will easily grow from a cutting, meaning you can spread the lavender joy around your garden for free. But you need to know how to take lavender cuttings for successful results.
- Why grow plants from lavender cuttings?
- When to take lavender cuttings
- How to take lavender cuttings: a step-by-step guide
- Different methods of growing lavender from cuttings
- Tips for successful lavender cutting
- Transplanting your lavender cuttings
- How to care for new lavender plants
- Troubleshooting lavender problems
- FAQs
Thankfully, growing new plants from lavender cuttings is super-easy, but there are a few steps to follow to ensure healthy new bushes of this valuable bee and butterfly attractor.
This article explores how to grow new plants from lavender cuttings with a step-by-step guide that guarantees success. And once your new plant is thriving, you’ll need some expert care tips.
It’s all here. So, let’s get started!
Why grow plants from lavender cuttings?

Propagating new plants from lavender cuttings has several benefits over other cultivation methods.
Firstly (and perhaps most importantly), it’s cost-effective and simple to cultivate a new plant from a lavender cutting. Indeed, it’s possible to produce multiple plants without spending a single penny on seeds or young plants.
Growing a plant from a cutting means that it benefits from the vitality of the mother plant. So, as long as you choose a healthy plant for your cuttings, you’ll enjoy healthy new plants with the same fragrant flowers and medicinal properties as the original plant.
Finally, cuttings take root quickly and grow more rapidly than producing a new plant from seed. This means you’ll more quickly enjoy healthy mature plants in your garden.
When to take lavender cuttings
It’s best to take your cuttings in spring or early summer while the plant is actively growing. This ensures you take healthy shoots that root quickly and develop into new plants.
Only take cuttings from healthy, non-flowering shoots — those with flowers will root more slowly.
Ensure that the mother plant is well-hydrated and showing no signs of too little water — if the plant is dry, the cuttings are unlikely to develop roots.
How to take lavender cuttings: a step-by-step guide

This is a simple, foolproof process consisting of a few easy steps.
- Select healthy, non-flowering side shoots, ensuring they have a thin, woody bark section at the bottom. Your cutting needs to be 10-15cm long, showing no signs of disease or pest infestation.
- Remove the shoots with a sharp, cleaning pruning shear or knife. Make a slanted cut just below the leaf knot to help the cutting root more easily.
- Cut away the lower leaves from the cuttings, leaving 5cm of bare stem at the bottom — this will assist the rooting process.
- Fill a well-draining pot with a fine potting mix, such as vermiculite or good-quality potting soil mixed with sand. Insert the exposed stems into the potting soil.
- Water the lavender cuttings after placing the pot in a warm, sunny place. Ensure the soil remains moist (but never too wet). The cuttings should take root within 4-6 weeks.
- Once the cuttings are sufficiently rooted, transfer them into individual pots or plant them directly in the ground. The plants need plenty of sunlight and regular irrigation until they’ve fully settled — at which point, they’ll develop drought resistance.
How do I know if my cutting has developed roots?
Wait at least one month before testing for roots — six weeks is better.
Then, give the cutting a very gentle tug upwards, away from the soil surface. If you acknowledge resistance, roots are developing nicely. If you pull the cutting, and it leaves the soil with no resistance, it will need longer.
Different methods of growing lavender from cuttings
An alternative approach to developing new plants from lavender cuttings is to place the cutting in a glass of water. Again, strip the lower 5cm of its leaves and replace the water regularly to ensure it doesn’t go stagnant.
It’s easier to see the roots as they develop with this method, but it could take a little longer than the soil method.
However, once the cutting has developed its roots, transplant them into soil and grow as usual.
Using growth hormones

Another way to ensure good root development is to use growth hormones, which come in powder form. Simply dip the cut tip of the stem into the powder before planting in potting soil or vermiculite, and it will accelerate the rooting process.
Always read and follow the instructions to ensure you use the right amount of the powder.
Tips for successful lavender cutting
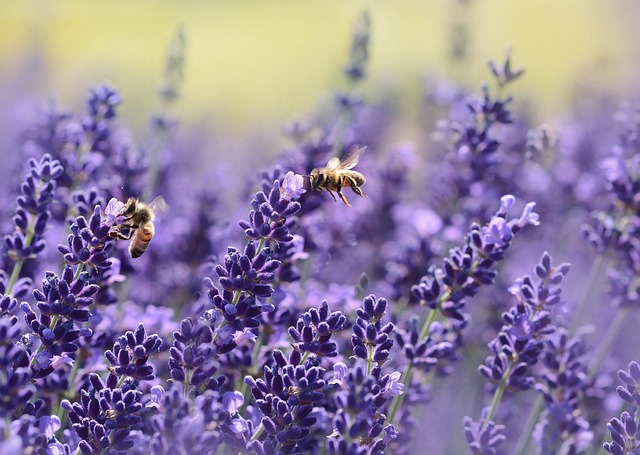
These are the essential tips for successful lavender cutting:
- Take cuttings from healthy, non-flowering shoots
- Always cut with clean tools. This helps avoid disease.
- Remove the bottom 5cm of leaves to avoid rotting.
- Always use good-quality, well-draining potting medium, such as vermiculite.
- Keep your cuttings moist (but the soil should never be soggy!)
- Place the cuttings in a warm, sunny place.
- Be patient! Give the cuttings enough time to take root!
Transplanting your lavender cuttings
Once your cuttings have developed roots, it’s time to transfer the plant into its growing position.
Planting in pots
If you’re planting them in pots, make sure the soil type is right for an adult plant. Typically, they prefer poor, dry, and moderately fertile soil — a sandy loam with a mild mix of nutrients is best.
The ideal custom blend for adult lavender plants is a mix of:
- Peat moss
- Perlite
- Pumice
- Sand
- Horticultural charcoal
- Worm castings
- Lime
This light mix remains aerated and well-draining.
Planting in flower beds
Of course, your lavender plant still needs the same amount of light and moderately nutritious soil. If you have sandy, fast-draining soil, you’re good to go!
However:
It’s a significant problem if you have heavy clay soil, which is too high in nutrients and water retention
So, if you have heavy soil, dig a hole and mix in well-rotted compost and horticultural sand to improve the drainage before planting. Otherwise, the new roots could rot in soggy soil.
How to care for new lavender plants
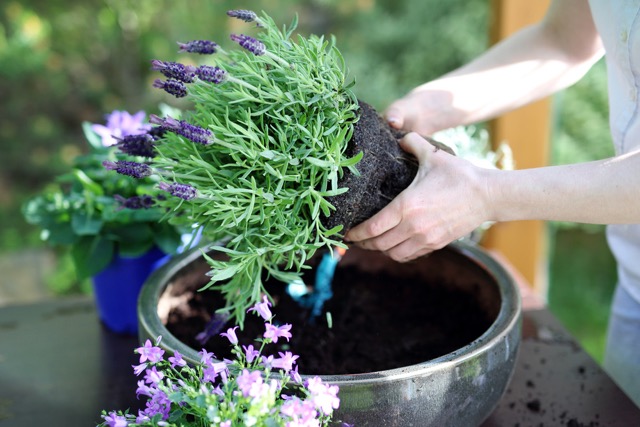
Once you’ve replanted your lavender plants, make sure they stay strong and healthy by:
- Watering regularly at first — but always avoid over-watering. Established plants prefer dry conditions, so you’ll typically rely on rainfall rather than manual watering once the plant has taken good root in its final position.
- Position the plant in a sunny spot with at least 6 hours of direct sunlight each day.
- Feed with a sprinkle of potash around the plant base once a year. Don’t overfeed; avoid manure and high-nitrogen fertilisers — they’ll damage the plant.
- Prune your plant each year to prevent woodiness and disease. Check out our expert’s guide to pruning lavender.
Troubleshooting lavender problems
Here’s how to deal with common lavender problems:
- Yellow/discoloured leaves — typically indicates overwatering. Cut back on manual watering.
- Poor growth — if your plant fails to thrive, it could be due to a lack of sunlight. Perhaps move your plant to a sunnier spot.
- Disease — fungal infections and root rot affect the plant’s vitality. Keep the soil dry around your plant and pull up surrounding weeds.
- Pests — combat lice or spider mites with nematodes.
FAQs
Absolutely! Take a 10-15cm cutting from a non-flowering branch, remove the lower 5cm of leaves, and place it in potting soil. Keep the soil moist; give it 4-6 weeks to develop roots. Then transfer to its final spot.
Yes. Simply take a 10cm-15cm cutting from a non-flowering branch, strip off the bottom 5cm of leaves to prevent rotting, then place in 5cm of water. Replace the water every few days to keep it fresh. Then, after around a month, you’ll see roots appearing — ready for transplanting.
Wait till spring or summer — when the plant is actively growing. This means the cutting will be full of vitality; ready to develop new roots!
Any questions?
I hope you feel confident to take your own lavender cuttings, but if you have any questions, email us, and we’ll get back to you ASAP.
Or check out our comprehensive Help & Advice section!
Thanks for reading!
-
Orchids: A Complete Guide on How to Care for ThemWant to give your orchid the best possible care? Discover essential tips from placement to watering and pruning. Learn everything you need to know!Read more
-
Growing Wisteria Made Simple: From Planting to Perfect BloomsWith blossoms like a purple waterfall, Wisteria sets an almost magical and colourful mood. If you want to grow this beauty in your garden, you’ll need a bit of patience. Don’t worry, it will most definitely pay off.Read more
-
How to Build a DIY Greenhouse: A Practical Guide for Smart SpendersImagine extending your growing season throughout the year, nurturing tender plants regardless of the weather, and creating a personal garden sanctuary. This is precisely what a DIY greenhouse offers you. Let’s learn how to build one.Read more
-
How to Grow Eucalyptus in British GardensWith a little love and care, eucalyptus trees can thrive in English gardens. Since they don’t germinate well without proper help, there are not considered invasive. So, there is no reason not to plant them if you enjoy their looks.Read more
-
Transform Your Garden with All-Year-Round Flowering PlantsDid you know you can enjoy blooming flowers even in January? With the right selection of all year round plants, there’s no need to wait until spring to add some colour to your garden.Read more
-
How to Create a Butterfly Garden: A Simple Guide for British GardensThe UK's butterfly population includes 59 different species. These beautiful winged creatures face a steady decline because of habitat loss, pollution and changing weather patterns. Your garden can become a vital link between nature reserves and natural habitats. Let’s explore how.Read more
-
Volcanic Rock Dust for Your Garden—Application and TipsDid you know that volcanic rock dust is a brilliant organic soil improver? This article explains exactly what it's good for and how to use it properly.Read more
-
How to Use Landscape Fabric ProperlyIf weeds or erosion in your garden are troubling you, landscape fabric might be the solution. We’ll explain how and when to use it properly, just keep on reading.Read more
Leave a comment
Your answer will be displayed on the site and the interested party will be notified by email.
Leave a comment
Have a question or want to share your experience? Leave us a comment.
- Order by 2PM = shipped today
- 250.000+ satisfied customers!
- 60 day satisfaction guarantee
- Order by 2PM = shipped today
- 250.000+ satisfied customers!
- 60 day satisfaction guarantee

🌱 All important maintenance moments for your lawn during the year. Leave your email and we will send you the lawn calendar for free.
Enter your email
Receive the lawn calendar in the mail
Enjoy a green lawn all year round!










Comments (0)
There are no comments yet. Well then, what are you waiting for to
Be the first to write your comment!inaugurate this pretty page?
Do you have some comments?