Log in or create new account to save this product to your wishlist.
How to Grow & Harvest Garlic: The Complete Guide
Garlic, with its numerous health benefits and distinctive flavour, is not only a staple in kitchens worldwide. It’s also an incredibly rewarding plant for you to grow in your garden. Find out now how to best go about it.
🌱 All important maintenance moments for your lawn during the year. Leave your email and we will send you the lawn calendar for free.
Enter your email
Receive the lawn calendar in the mail
Enjoy a green lawn all year round!
Known for its high allicin content, along with antibacterial, antioxidant, and antifungal properties, garlic is simply formidable. More so, the process of growing garlic is surprisingly straightforward, thriving on what can be described as benign neglect. This ease of cultivation, coupled with the superior taste of home-grown garlic, makes it an appealing endeavour for any aspiring gardener—or hobby-cook. Let’s learn how to grow garlic!
- Choosing the right garlic variety
- Purchasing seed garlic
- Finding the right spot for planting garlic
- Preparing the soil and planting
- The best planting techniques
- Protecting and supporting growth
- Precautions against common issues with garlic
- Grow garlic & care for your plants
- Essential watering and weeding practices
- Grow garlic and manage scapes
- Pest and disease control
- Feed for growing garlic
- Typical challenges when you grow garlic at home
- Harvesting and curing garlic
- Using your home-grown garlic
- How to grow garlic FAQs
- Ready to grow garlic?
Choosing the right garlic variety
Choosing the proper garlic variety is the first step to successful cultivation, as different types respond differently to various climates and culinary needs.
Types of garlic
Most garlic belongs to one of two kinds, hardneck or softneck garlic. But there are also some special varieties like elephant garlic. It has no cultivars and is known for its giant, mild-flavoured bulbs, perfect for those preferring a subtler garlic taste.
Softneck garlic
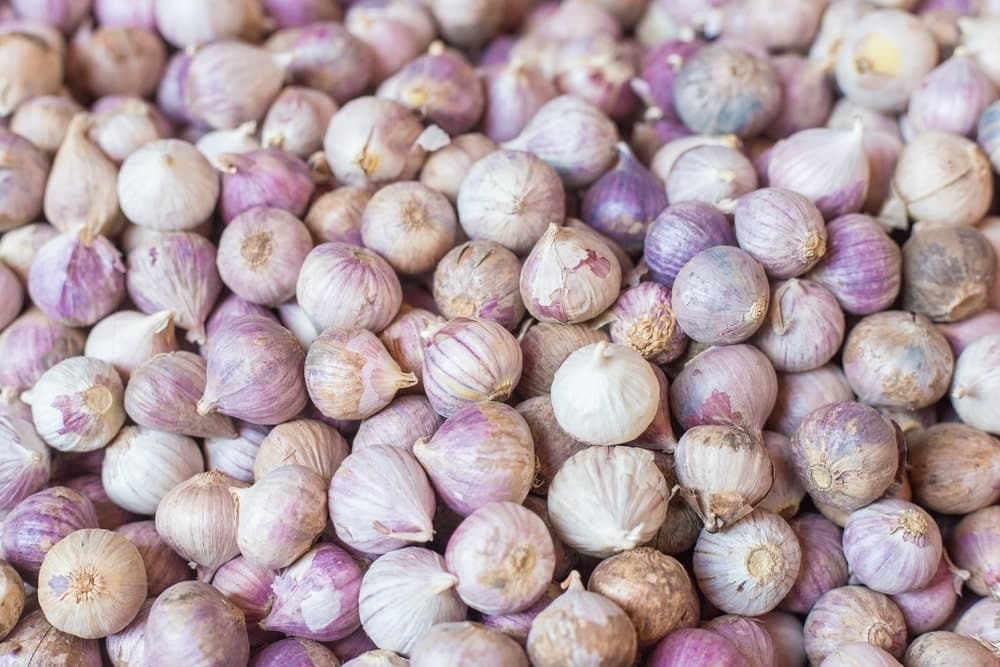
Softneck garlic is the most common kind found in stores. This type of garlic can have up to 18 cloves per bulb. It features white, papery skin and is known for excellent storage capabilities, often lasting up to a year. Best grown in milder climates without severe winters unless provided with winter protection.
Hardneck garlic
More robust against cold, hardneck garlic is suitable for a broader range of UK climates. Also, it produces a flower stalk known as a scape, which should be removed to encourage larger bulb growth. The flavour is stronger compared to softneck garlic, which makes it ideal fo culinary uses like stir-fries and pesto from its scapes.
Choosing based on your needs
- Flavour preferences: If you prefer a mild flavour, softneck varieties like Silverskins may be ideal. For a more robust taste, consider hardneck types like Rocamboles.
- Storage needs: Softneck garlic generally stores longer due to its multiple layers of papery skin, making it suitable for long-term use.
- Growing conditions: Hardneck varieties are preferable in colder areas due to their resilience against harsh winters. In contrast, softneck types thrive in milder conditions.
Variety overview
Now that you know a bit more about what to look out for, here is an overview of the common types and their specific characteristics. Take your pick and grow some garlic!
Hardneck garlic types
- Rocambole – Known for its rich, complex flavour, Rocambole garlic has a loose skin which makes it easier to peel.
- Porcelain – Porcelain garlic types are known for their thick and durable skin, which makes them excellent for storing. They also have a robust and sometimes hot flavour.
- Purple Stripe – This type is named for the distinctive purple stripes on its skin. It’s often praised for its sweet flavour when roasted.
- Marbled Purple Stripe – A subtype of Purple Stripe, these have marbled, mottled skin and a strong, spicy flavour.
- Glazed Purple Stripe – Another subtype of Purple Stripe, with a glossy, glazed appearance and a milder flavour profile.
- Turban – Named for their turban-like tops, they tend to have a strong, warm taste and are one of the earliest to harvest among hardnecks.
Softneck garlic types
- Artichoke – Characterized by several layers of cloves arranged in a somewhat haphazard manner, Artichoke garlics have a milder taste and are quite common in supermarkets.
- Silverskin – These are among the best for braiding and long-term storage, and they have a strong, sharp taste.
- Creole – Known for its rich, deep flavour and good storage qualities in warm climates.
- Inchelium Red – An Artichoke garlic type with a mild, but full flavour; it has won taste contests for its exceptional flavour.
- California Early – It’s a very common commercial variety, known for its robust flavour and early harvest.
- California Late – Similar to California Early, but harvested later and has a somewhat longer shelf life.
- Mexican Purple – Despite the name, it’s a softneck variety that can develop a rich, spicy flavour, especially when grown in Mexican climates.
Purchasing seed garlic
To ensure healthy growth and disease prevention, always opt for certified, disease-free seed garlic. Avoid using garlic from supermarkets as it may not be suited for local growing conditions and could carry diseases. Many cloves you find in the supermarket are from China, just check the label. Those are often heavily doused in pesticide and even bleached. Best stay away from them, if you want to grow healthy, organic garlic.
Do you have a friend who already successfully started planting garlic from seeds? Then you can, of course, fork some off to start your own garlic farm at home.
Finding the right spot for planting garlic
You can plant garlic indoors, outside or in a greenhouse. When you plant them inside the house, make sure to pick a well-ventilated room. After all, garlic does smell like garlic and even though the odour is less pronounced in the growing garlic plants, you might create a smelly catastrophe if something goes wrong. Also, the smell might depend on the variety.
Furthermore, garlic needs the winter cold to vernalize. So even if you cultivate it indoors, leave it outside or in the fridge during the winter.
Preparing the soil and planting
When preparing to plant garlic, the choice of location and soil preparation are crucial. Opt for a warm, sunny spot, as garlic thrives in full sunlight. The soil should be fertile and well-drained. This is particularly important as garlic does not perform well in overly wet conditions. Begin by removing any weeds, which compete with garlic for nutrients and water.
Soil enrichment
Incorporate organic matter into the soil, to enhance the soil’s structure, moisture retention, and nutrient levels. Apply two bucketfuls of well-rotted manure or garden compost per square metre, which will provide the necessary nutrients to grow garlic. Additionally, consider adding a high potassium general fertiliser at one handful per square metre to encourage robust development.
The best planting techniques
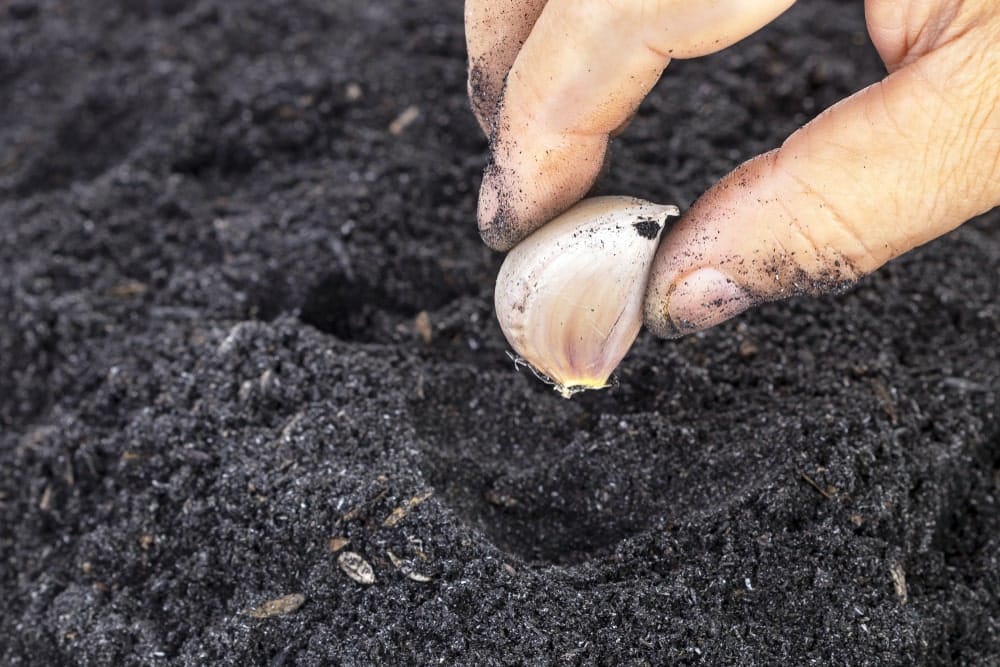
Ideally plant your garlic in autumn, four to six weeks before the ground freezes, to allow the roots to establish before winter dormancy. Plant cloves 6 inches apart, positioning them with the pointy end up and the base 1-inch below the soil surface. This depth helps protect the cloves while ensuring adequate exposure to the cold required for bulb development.
Protecting and supporting growth
After planting, cover the area with horticultural fleece to prevent birds from disturbing the cloves. For gardens prone to heavy weed growth, consider using a weed-suppressing membrane with slits for the garlic. Like this, you’re reducing the need for frequent weeding. This setup protects the young plants and maintains cleaner growing conditions.
Precautions against common issues with garlic
In regions with heavy, damp soils, starting garlic in modules within a cold frame before the spring planting can be advantageous. This method prevents the cloves from rotting in excessively wet winter soil. Always ensure that the soil is not compacted around the cloves, as garlic prefers loose, well-draining conditions to develop properly.
Grow garlic & care for your plants
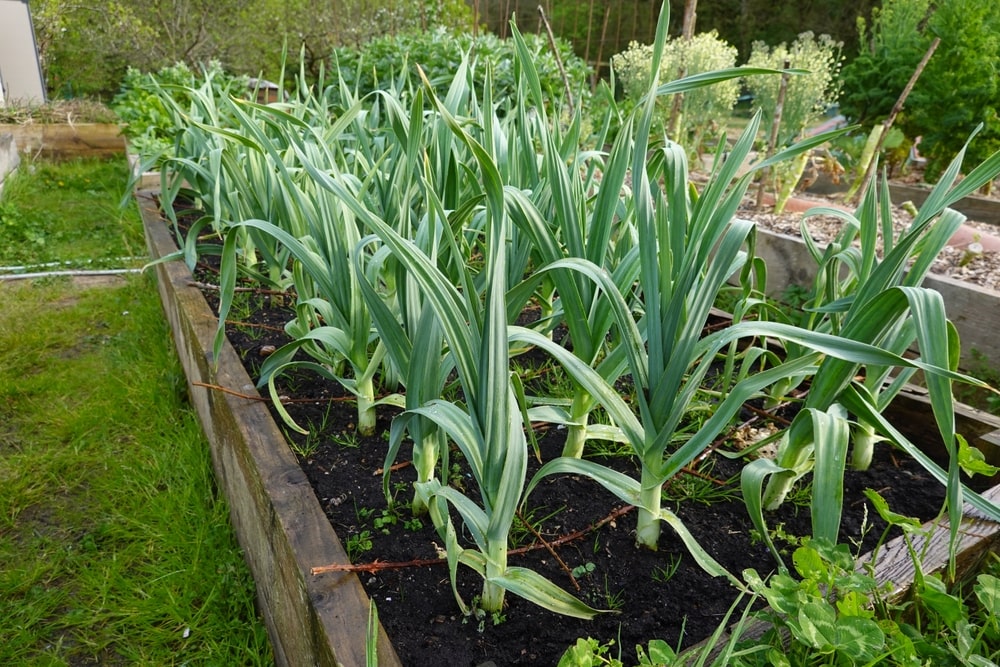
Garlic’s natural properties make it a fantastic companion for various plants in your garden. When planted alongside tomatoes, peppers, carrots, and cruciferous vegetables like cabbage and kale, garlic helps deter common pests. This includes aphids, Japanese beetles, and spider mites. As you can see, garlic is a natural pest control, that reduces your reliance on chemical pesticides and promotes a healthier, more biodiverse garden environment. Not to mention, it’s super tasty.
Essential watering and weeding practices
Garlic, like many other plants, requires consistent care to thrive. Watering and weeding are especially important.
Watering
Ensure garlic receives about 1 inch of water per week, combining rainfall and additional irrigation. This is particularly crucial when the leaves are forming and during dry spells. As the foliage begins to yellow in early summer, reduce watering to prevent over-saturation, which could harm the bulbs.
Weeding
Keep the area around garlic plants free from weeds. Weeds compete for water and nutrients, which can stifle garlic growth. Mulching with a 2-inch layer or regular weeding will help maintain the necessary nutrients and moisture levels in the soil.
Grow garlic and manage scapes
Garlic scapes, which appear on hardneck garlic varieties, are edible and offer a milder flavour compared to garlic cloves. They usually start appearing around 8 months after planting. Snip scapes in late spring or early summer when they begin to curl. This action redirects the plant’s energy from the scape to the bulb, promoting larger bulb growth. Utilize scapes in your cooking for a subtle garlic flavour. They can be chopped and added to dishes such as stir-fries and pestos, or preserved by blanching and freezing for later use.
Pest and disease control
When growing food, you will want to avoid using potentially harmful chemicals that wind up in your own belly. So for pest and disease control, it’s best to rely on physical barriers and natural remedies.
Cover young plants with horticultural fleece to prevent birds and small mammals from disturbing them. Additionally, employing a weed-suppressing membrane can reduce the need for frequent weeding.
Nutritional Supplements
Feed for growing garlic
The optimal fertiliser for garlic should have a balanced N-P-K ratio, with a slightly higher amount of phosphorus for root development. Before planting, incorporating well-rotted manure or compost into the soil can provide a slow-release nutrient source for the garlic.
As the garlic begins to form bulbs, a side dressing of a high-nitrogen fertiliser can encourage strong leaf growth, which is vital for bulb development. Avoiding high-nitrogen fertilisers close to harvest time is crucial, as this can deter bulb growth.
Once garlic has significant foliage, feeding it with liquid worm juice or seaweed fertiliser can provide a boost, helping in the development of robust garlic bulbs.

- 100% organic ingredients
- A vitamin boost and a fertiliser in one
- Improves soil quality
Typical challenges when you grow garlic at home
One common challenge you may face when growing garlic at home is not planting according to your specific climate. Garlic plants require a cold period to thrive, which can pose difficulties in frost-free climates. If you’re gardening in an area with mild winters, like Wales or the West of England, you might need to take extra steps to ensure a successful garlic harvest. An ideal winter for garlic would have temperatures that dip below freezing, but generally stay above -6 °C. Here are some strategies to help you overcome this challenge.
Adapting garlic cultivation to mild winters
- Choose suitable varieties: Opt for garlic varieties that are known to perform well in warmer climates, like creole or turban garlic. These types often have a shorter chilling requirement.
- Refrigeration before planting: Mimic the garlic’s needed cold exposure by refrigerating the cloves for several weeks before planting. This process is called vernalization.
- Strategic planting time: Plant your garlic in the late winter or early spring instead of fall, which allows the plant to experience cooler temperatures during its crucial initial growth phase.
- Mulching for temperature control: Apply a thick layer of mulch to help regulate soil temperature and moisture. Mulch acts as an insulator, keeping the soil cooler during unexpectedly warm spells.
Harvesting and curing garlic
Now that you know how to grow garlic, it’s time to focus on the harvest. Pick the right time to gather the bulbs. Let your eyes and your nose be your guide!
Timing your harvest
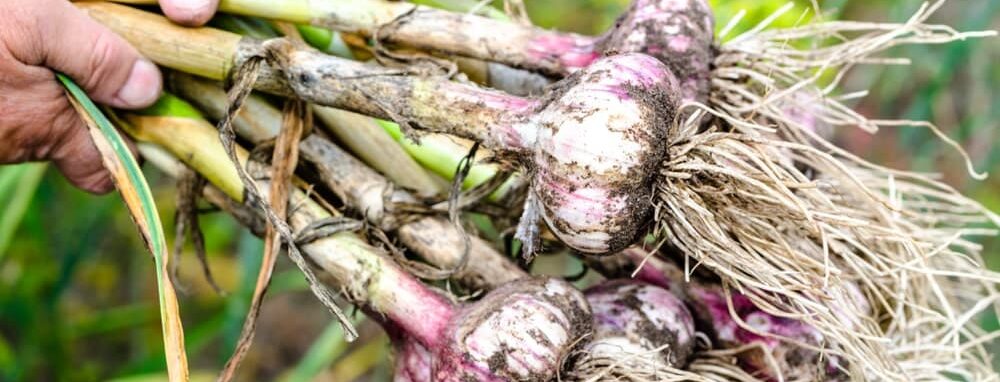
Start checking your garlic plants from July onwards. The ideal time to harvest is when approximately 40% to 60% of the top growth has died back and turned yellow or brown. This indicates that the bulb development has ceased, and the garlic is ready to be pulled out.
Careful digging
Use a digging fork to loosen the soil around the garlic. Insert the tines of the fork a few inches away from the garlic stems to avoid damaging the bulbs. Gently lift the garlic from the soil, ensuring you keep the stems intact.Initial cleaning: Shake off any loose soil from the bulbs and remove any large clumps. Be gentle to avoid bruising the garlic, which can affect its storage life.
Curing your garlic
If you want to store your garlic, you need to cure it first. Here’s how to cure your garlic effectively:
- Setting up a curing area
Choose a warm, dry, and shaded spot with good ventilation for curing your garlic. A barn loft, covered patio, or any space with a consistent airflow works well.
- Arranging the garlic
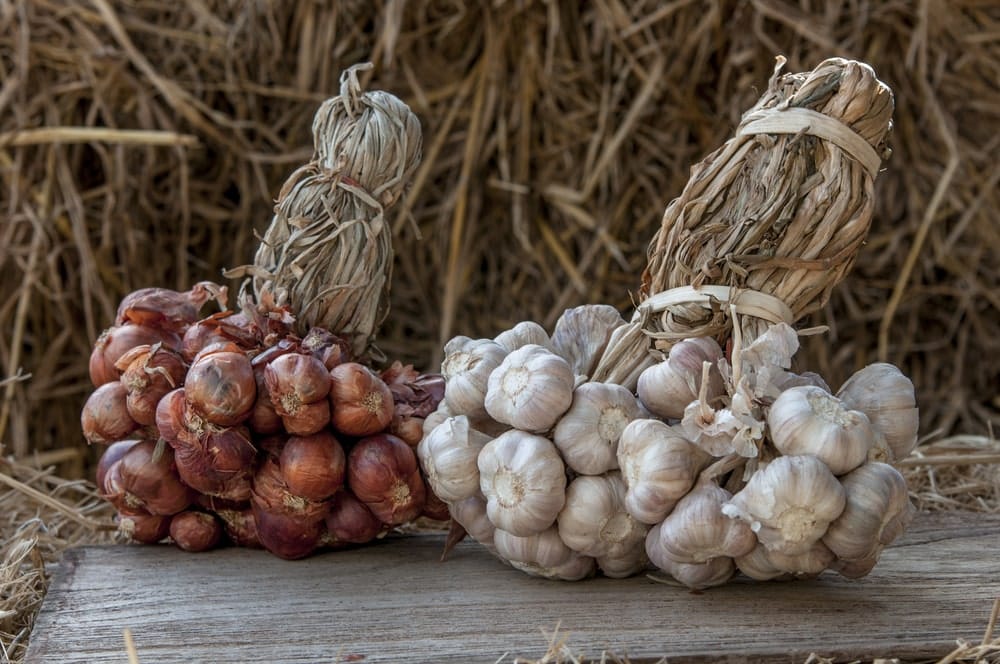
Lay the garlic bulbs or hang them in small bunches. Ensure they are not touching each other to promote good air circulation around each bulb.
- Duration of curing
Allow the garlic to cure for about 2 to 4 weeks. The exact time can vary depending on your local climate conditions. Curing is complete when the roots have dried to a brush-like texture, and the outer skin of the bulb feels papery.
- Post-curing
Once cured, trim the roots to about 1/4 inch and cut the stems about 1 inch above the bulb. If you have softneck varieties, you might choose to braid the stems before they fully dry.
Storing cured garlic
Proper storage is important to maintaining the quality of your garlic. When done right, you can store your garlic for up to a year.
- Choosing the right container: Store garlic in breathable containers such as mesh bags, paper bags, or even old pantyhose. These allow for air circulation, which is vital to prevent mould and decay.
- Ideal conditions: Keep your stored garlic in a cool, dark place. The optimal storage temperature is between 10°C to 15°C with around 60% humidity. Avoid areas with high heat or direct sunlight.
- Regular checks: Periodically check your stored garlic for any signs of spoilage, such as mould or softness. Remove any compromised bulbs to prevent the spread of decay to healthy ones.
Using your home-grown garlic
Once your garlic has been harvested and cured, storing it properly is essential to maintain its freshness and flavour. Garlic is incredibly versatile in the kitchen, whether used fresh, dried, or powdered. Here are some tips for using your stored garlic.
Fresh garlic
Use freshly cured garlic directly in your cooking for robust flavour. Fresh garlic is particularly great in dishes where its bold flavour can stand out, such as in sauces and marinades.
Making garlic powder
Slice peeled cloves thinly and dry them in a food dehydrator or an oven set to a low temperature. Once completely dry, grind the slices in a spice grinder until you achieve a fine powder. Store the garlic powder in an airtight container in a dark, dry place to maintain its potency.

Freezing garlic
- Whole bulbs: Freeze whole cured bulbs in airtight bags or containers.
- Individual cloves: Peel and freeze individual cloves on a tray before transferring them to a container, allowing you to use a clove or two at a time.
- Chopped garlic: Chop garlic and freeze it in teaspoon-sized portions, perfect for adding directly to the pan in future recipes.
How to grow garlic FAQs
It’s best to plant garlic in the fall, specifically between late September and November, in regions that experience a hard frost. Plant garlic in cloves about 6 to 8 weeks before the ground freezes, which is usually before the first fall frost date.
Chicken manure is highly recommended as a fertiliser for garlic because it is rich in nitrogen and also provides phosphorus, potassium, and other essential nutrients that contribute to the development of strong and healthy garlic plants.
Garlic bulbs are ready for harvest when the leaves start to turn yellow. If you planted your garlic in the autumn, expect to harvest it in early summer. For garlic planted in spring, the harvest time will typically be from mid-summer to early autumn. It’s important to harvest on time because if you wait too long, the bulbs may start to split open, making them less suitable for storage.
To maintain an ongoing supply of garlic, you can plant cloves at intervals, ensuring that as one batch is harvested, another is growing. Additionally, by carefully selecting and saving cloves from your harvest to replant, you can sustain your garlic stock indefinitely.
Ready to grow garlic?
Now you should have all the information you need to grow garlic. If you still have more questions you can leave a comment. Or maybe you would like to tell us about your recent success in the garden? In case you are just starting your own vegetable garden, we have a guide about creating a vegetable garden, vertical vegetable farming and one on herbs and spices, too.
Happy gardening!
-
How to Grow Eucalyptus in British GardensWith a little love and care, eucalyptus trees can thrive in English gardens. Since they don’t germinate well without proper help, there are not considered invasive. So, there is no reason not to plant them if you enjoy their looks.Read more
-
Transform Your Garden with All-Year-Round Flowering PlantsDid you know you can enjoy blooming flowers even in January? With the right selection of all year round plants, there’s no need to wait until spring to add some colour to your garden.Read more
-
How to Create a Butterfly Garden: A Simple Guide for British GardensThe UK's butterfly population includes 59 different species. These beautiful winged creatures face a steady decline because of habitat loss, pollution and changing weather patterns. Your garden can become a vital link between nature reserves and natural habitats. Let’s explore how.Read more
-
Volcanic Rock Dust for Your Garden—Application and TipsDid you know that volcanic rock dust is a brilliant organic soil improver? This article explains exactly what it's good for and how to use it properly.Read more
-
How to Use Landscape Fabric ProperlyIf weeds or erosion in your garden are troubling you, landscape fabric might be the solution. We’ll explain how and when to use it properly, just keep on reading.Read more
-
Hostas: A Complete Care GuideIf you have a north-facing garden or some shady corners on your property, hostas are the plants for you. These green delights thrive particularly well in partial to full shade and require consistently moist soil to perform at their best.Read more
-
How to Grow Grapes in Your Garden: A Simple Step-by-Step GuideGrapevines produce some tasty fruits, but often they are simply grown for their gorgeous leaves. Whatever your motivation may be, we have a guide on how to grow grapes for you.Read more
-
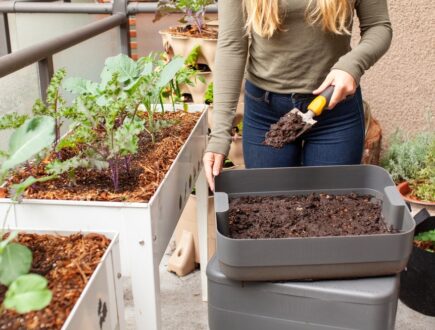
Worm Composting Made Simple: From Kitchen Scraps to Garden GoldDid you know that a single pound of composting worms can devour half their body weight in waste every day? That's roughly twelve pounds of kitchen scraps transformed into garden gold each month! We will look at how to make this happen.Read more
Leave a comment
Your answer will be displayed on the site and the interested party will be notified by email.
Leave a comment
Have a question or want to share your experience? Leave us a comment.
- Order by 2PM = shipped today
- 250.000+ satisfied customers!
- 60 day satisfaction guarantee
- Order by 2PM = shipped today
- 250.000+ satisfied customers!
- 60 day satisfaction guarantee
- Order by 2PM = shipped today
- 250.000+ satisfied customers!
- 60 day satisfaction guarantee

🌱 All important maintenance moments for your lawn during the year. Leave your email and we will send you the lawn calendar for free.
Enter your email
Receive the lawn calendar in the mail
Enjoy a green lawn all year round!




 Summer Deal! Get 15% off the


Comments (0)
There are no comments yet. Well then, what are you waiting for to
Be the first to write your comment!inaugurate this pretty page?
Do you have some comments?