Log in or create new account to save this product to your wishlist.
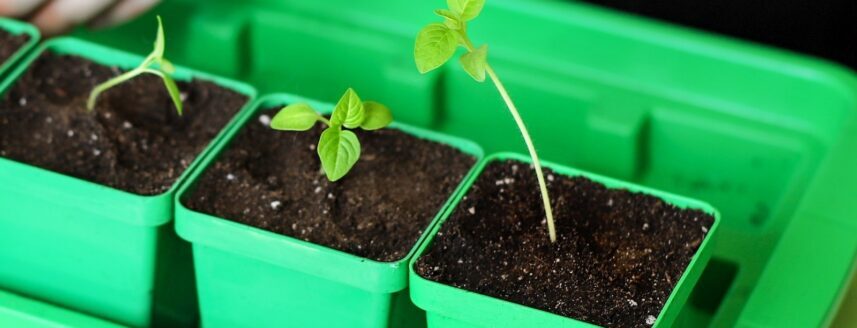
Pricking Out Seedlings: Why, When, and How?
Pricking out seedlings is crucial for healthy growth. Learn when and how to do this for strong plants in your vegetable or flower garden.
🌱 All important maintenance moments for your lawn during the year. Leave your email and we will send you the lawn calendar for free.
Enter your email
Receive the lawn calendar in the mail
Enjoy a green lawn all year round!
- Order by 2PM = shipped today
- 250.000+ satisfied customers!
- 60 day satisfaction guarantee
Pricking out seedlings is a vital step in growing healthy plants. This technique, also known as transplanting seedlings, helps young plants become stronger and grow better. For many gardeners, recognising the right time to prick out seedlings can be challenging. That’s why understanding what pricking out involves and when it’s necessary is essential for your success.
- What is pricking out?
- Why prick out seedlings?
- When to transplant seedlings?
- Which plants benefit from pricking out?
- Common mistakes and how to avoid them
- Frequently asked questions about pricking out
- Give your seedlings the best start
In this article, we’ll delve deeper into everything related to pricking out. We’ll discuss why it’s important, when you should transplat seedlings, and how to prick out seedlings step by step. You’ll also learn which plants benefit from it and how to avoid common mistakes.
What is pricking out?
Pricking out seedlings is an essential technique in plant cultivation where young seedlings are transplanted. It involves moving seedlings that are growing close together in seed trays or propagation pots into individual pots or into the ground. Like this you’ll give the seedlings more space to grow, so they may develop a strong root system. Then they also receive sufficient light and nutrients, resulting in stronger and healthier plants.
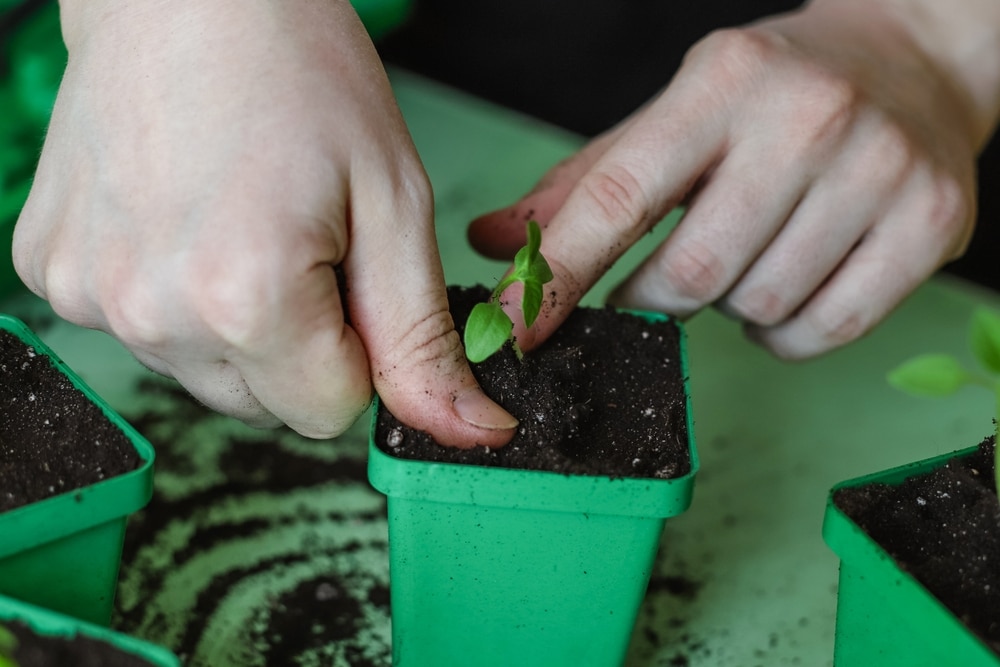
The right time to prick out seedlings is when they’ve developed their first two true leaves. These start to grow after the initial cotyledons.
Why prick out seedlings?
Pricking out seedlings significantly impacts their development and growth. When seedlings are crowded, they lack sufficient space, light, and nutrients. This results in weak plants that develop poorly. Pricking out gives each plant the opportunity to thrive.
By pricking out seedlings, they gain more space to form a strong root system. This is vital for nutrient and water uptake. Plants with well-developed roots are more resilient to stress and diseases.They have better access to nutrients and light, leading to healthier growth.
When to transplant seedlings?
The right time to prick out seedlings is when they’ve developed their first two true leaves. These follow the cotyledons. True leaves resemble those of the mature plant, while cotyledons are long and narrow. It’s important to recognise these stages to know when seedlings need pricking out.
Seasonal considerations
Ideally, prick out plants in spring, after indoor winter sowing. The outdoor temperature should be around 15 degrees Celsius. Also consider the growth rate of specific plants; fast-growing species can be pricked out earlier.
Environmental factors to consider
Some seedlings grow slowly or are vulnerable to hungry pests. It’s best to let them grow in pots in a protected environment (greenhouse or under netting) until they’re strong enough. If the soil or air is too cold, seedlings can stay in a sheltered spot.
Signs that seedlings are ready for pricking out
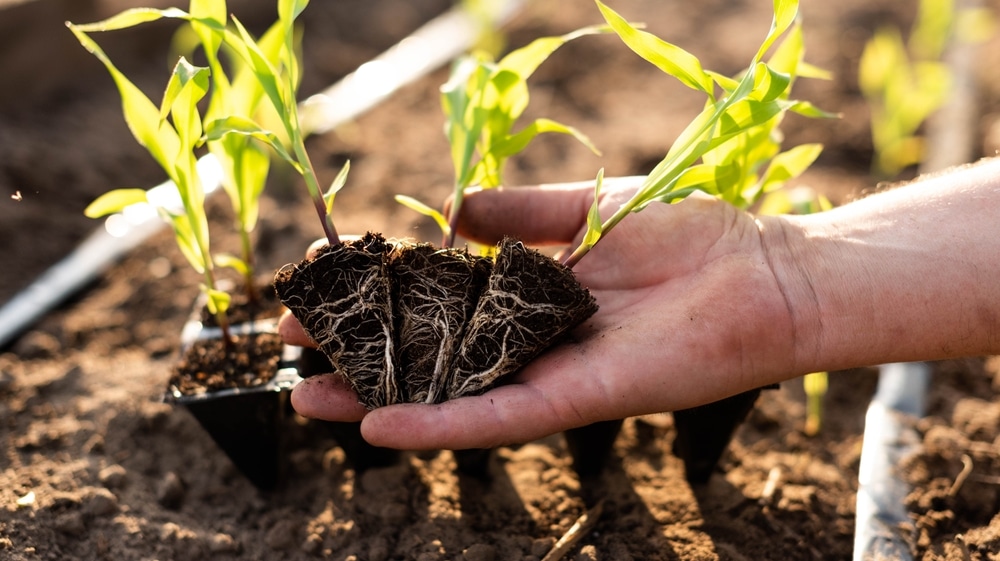
Check if the roots have reached the bottom or got tangled up. This indicates it’s time to prick out the seedlings. They should be big enough to handle, but not too long or thin.
Balancing between pricking out too early or too late
Pricking out seedlings too early can cause stress, while doing it too late can lead to cramped space and poor growth. The ideal time is when seedlings are sturdy enough, but still have room to grow.
Step-by-step guide for pricking out
To prick out seedlings, you’ll need:
- potting soil
- pots (preferably with drainage holes, recyclable pots, like dairy cartons, are ideal and eco-friendly.)
- teaspoon or pricking out fork
- gardening gloves (optional)
Preparation
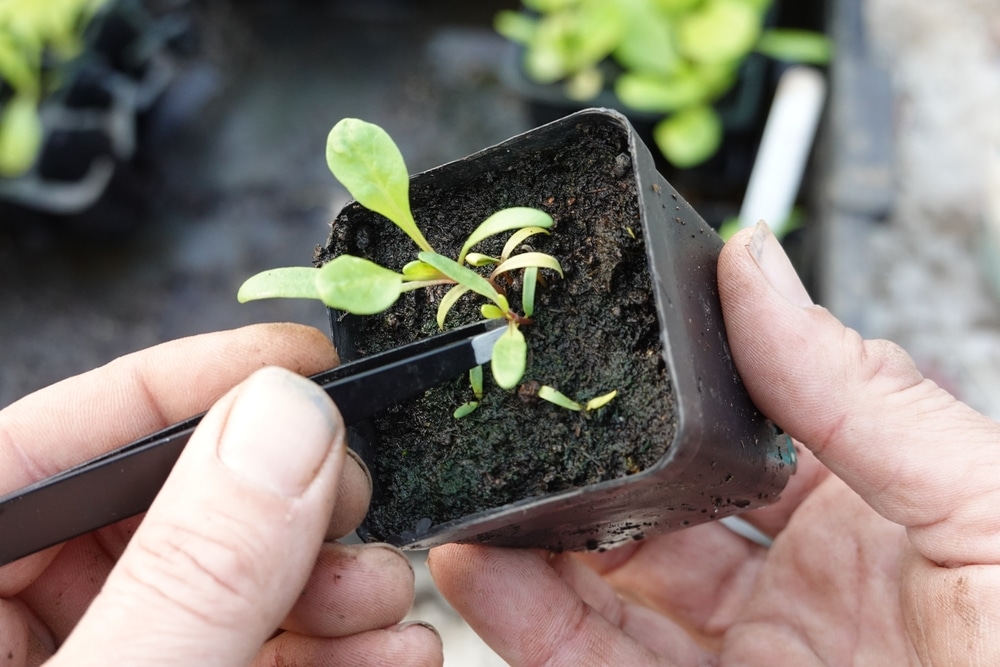
Get all your supplies ready. Then fill the new pots with potting soil and make a hole in the centre with a pencil. Ensure the pots are deep enough, especially for taller seedlings.
The pricking out process
- Carefully remove the seedlings from their original pot using a small spoon or pricking out fork.
- Hold the seedling by its leaves, not the stem.
- Place the seedling in the new pot, burying it up to the cotyledons.
- Gently firm the soil around it, but don’t press too hard.
- Water immediately after pricking out.
Aftercare for pricked out seedlings
Check the seedlings daily and water every few days. Place them in a cool spot to slow growth if they become too long and thin. A temporary growth pause is normal, but they’ll soon start growing again.
Which plants benefit from pricking out?
Pricking out seedlings is a valuable technique for many plants, but not all. Tomatoes are an excellent example of plants that benefit from pricking out. They easily form roots along the stem, responding well to this method. Prick out tomatoes when the first true leaves appear.
Other vegetables and flowers that respond well to pricking out include:
- Lettuce
- Cabbage
- Peppers
- Aubergine
- Various flower species
However, some plants don’t tolerate pricking out well. These are mainly plants with a taproot, such as:
- Carrots
- Radishes
- Parsnips
- Beetroots
- Daikon radishes
- Courgettes and Pumpkins
It’s best to sow these plants directly in their final location. Pricking out can damage their taproot, leading to misshapen or poorly growing plants.
Common mistakes and how to avoid them
One of the biggest problems is overwatering, which can lead to root rot and fungal growth. It’s better to water when the soil feels dry to the touch.
Another mistake is using pots that are too large. This can lead to overwatering and wasting compost. Pots with 9×9 cm are ideal for most seedlings, while smaller 6 cm pots suit lettuce and small cabbage varieties.
Frequently asked questions about pricking out
Leggy seedlings often result from insufficient light. Move them to a sunnier spot to reduce stretching. When repotting, you can also plant them a bit deeper for extra support.
Choose a light, well-draining potting compost with adequate nutrients. This combination promotes healthy root development and helps young seedlings adapt quickly after pricking out.
Gently remove the seedling from its pot and place it in a slightly larger pot with fresh, airy potting compost. Plant the seedling a bit deeper than before and water to help the roots establish in the new soil.
Give your seedlings the best start
Pricking out seedlings might seem challenging at first, but if you apply the tips and guidelines from this article, you’re guaranteed success. Remember that by pricking them out on time, you’re giving them the best chance for healthy growth. So get started in your garden and watch your plants grow stronger and your vegetable patch and garden flourish!
Don’t have a proper vegetable patch yet? Learn all about starting your own vegetable garden and why you need a handy sowing calendar. No spacious garden? No worries! You can easily create a vertical vegetable garden or a small herb garden, allowing you to enjoy homegrown goodness anytime.
Need more advice? Check out our tips and garden guidance or ask your question below.
Happy gardening!
-
Orchids: A Complete Guide on How to Care for ThemWant to give your orchid the best possible care? Discover essential tips from placement to watering and pruning. Learn everything you need to know!Read more
-
Growing Wisteria Made Simple: From Planting to Perfect BloomsWith blossoms like a purple waterfall, Wisteria sets an almost magical and colourful mood. If you want to grow this beauty in your garden, you’ll need a bit of patience. Don’t worry, it will most definitely pay off.Read more
-
How to Build a DIY Greenhouse: A Practical Guide for Smart SpendersImagine extending your growing season throughout the year, nurturing tender plants regardless of the weather, and creating a personal garden sanctuary. This is precisely what a DIY greenhouse offers you. Let’s learn how to build one.Read more
-
How to Grow Eucalyptus in British GardensWith a little love and care, eucalyptus trees can thrive in English gardens. Since they don’t germinate well without proper help, there are not considered invasive. So, there is no reason not to plant them if you enjoy their looks.Read more
-
Transform Your Garden with All-Year-Round Flowering PlantsDid you know you can enjoy blooming flowers even in January? With the right selection of all year round plants, there’s no need to wait until spring to add some colour to your garden.Read more
-
How to Create a Butterfly Garden: A Simple Guide for British GardensThe UK's butterfly population includes 59 different species. These beautiful winged creatures face a steady decline because of habitat loss, pollution and changing weather patterns. Your garden can become a vital link between nature reserves and natural habitats. Let’s explore how.Read more
-
Volcanic Rock Dust for Your Garden—Application and TipsDid you know that volcanic rock dust is a brilliant organic soil improver? This article explains exactly what it's good for and how to use it properly.Read more
-
How to Use Landscape Fabric ProperlyIf weeds or erosion in your garden are troubling you, landscape fabric might be the solution. We’ll explain how and when to use it properly, just keep on reading.Read more
Leave a comment
Your answer will be displayed on the site and the interested party will be notified by email.
Leave a comment
Have a question or want to share your experience? Leave us a comment.
- Order by 2PM = shipped today
- 250.000+ satisfied customers!
- 60 day satisfaction guarantee
- Order by 2PM = shipped today
- 250.000+ satisfied customers!
- 60 day satisfaction guarantee

🌱 All important maintenance moments for your lawn during the year. Leave your email and we will send you the lawn calendar for free.
Enter your email
Receive the lawn calendar in the mail
Enjoy a green lawn all year round!





Comments (0)
There are no comments yet. Well then, what are you waiting for to
Be the first to write your comment!inaugurate this pretty page?
Do you have some comments?